Interior Renderings - Exposure for Background Outside
Posted: Tue May 03, 2011 10:47 pm
Getting the exposure right for an image seen through a window when rendering an interior can make a big difference in how realistic that image will appear.
It is important to keep in mind and to use the Exposure Control in the Camera Tab in the Render Dialog Box.
Consider these real-world photo examples. Notice that if the interior of the room is shot dark, that the exterior viewed through the window is exposed in such a way that the objects outside are understandable:
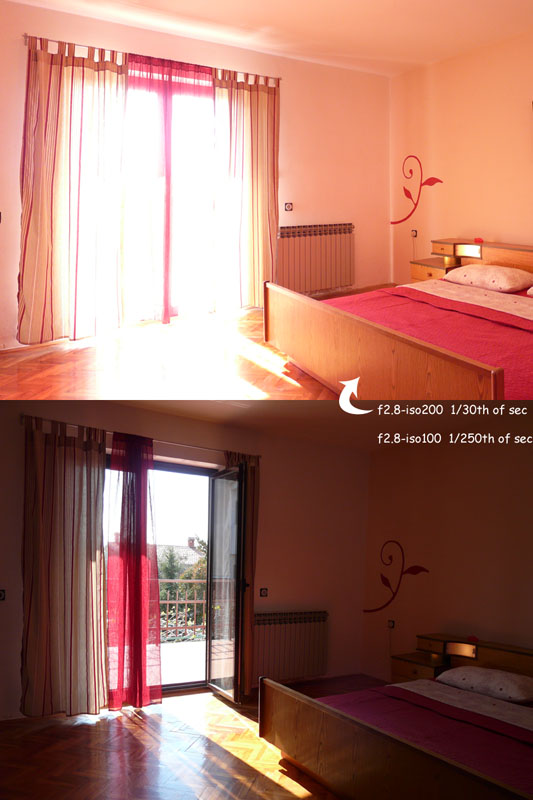
Notice that if the exposure of the camera is changed so that the room itself can be viewed in good lighting, the exterior becomes quickly overexposed:

In Subject: Master Bedroom
We can see in this great image by revered SketchUp artist and well-respected Twilight Render artist Tomyong that the external exposure doesn't match with what our eyes expect:
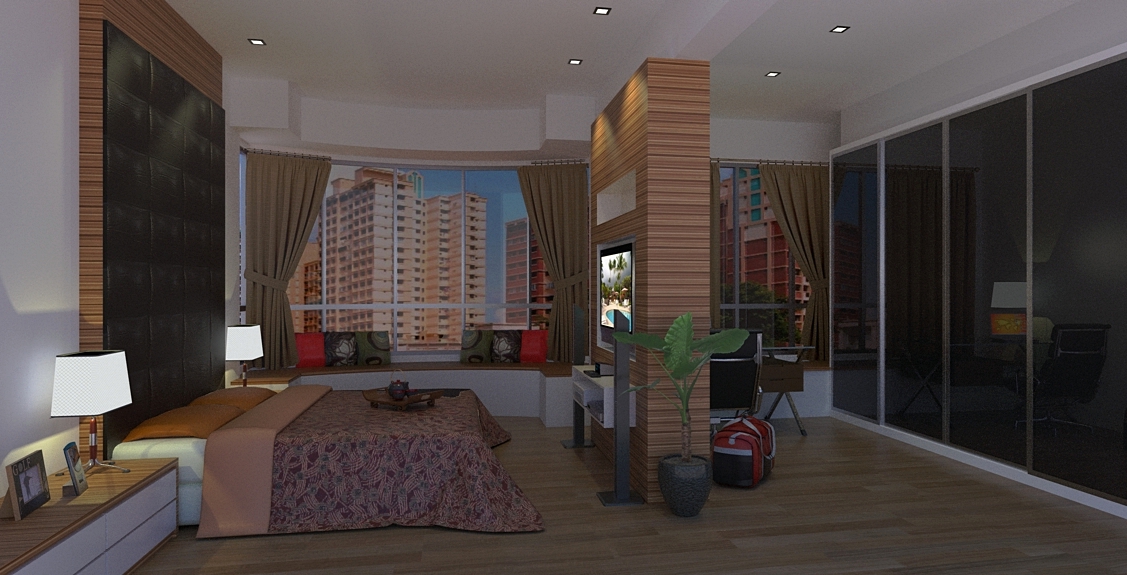
An attempt at correcting the exposure in post-pro was some-what successful, but it would be even better if the external exposure were done in the scene setup, eliminating need for much post-pro.
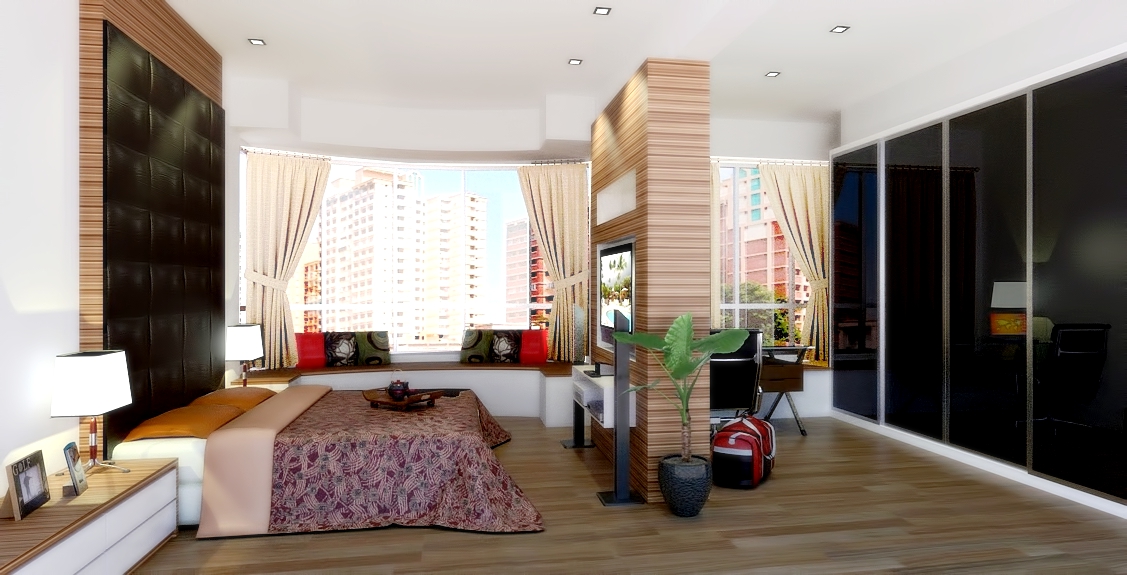
So, to increase the exposure on the exterior image:
Adjust exposure in the "Post-Process: Tone Mapping" area of the Render Dialog while rendering.
Set the background image you have inserted onto a backplate plane inside your SU model and set it to be a Light Emitter material template set to type:"fake" with power starting at 200watts/m2 (may vary depending on the scene and camera/tone map settings)
Example of real photo demonstrating interior vs exterior lighting with photographic exposure.

It is important to keep in mind and to use the Exposure Control in the Camera Tab in the Render Dialog Box.
Consider these real-world photo examples. Notice that if the interior of the room is shot dark, that the exterior viewed through the window is exposed in such a way that the objects outside are understandable:
Notice that if the exposure of the camera is changed so that the room itself can be viewed in good lighting, the exterior becomes quickly overexposed:
In Subject: Master Bedroom
We can see in this great image by revered SketchUp artist and well-respected Twilight Render artist Tomyong that the external exposure doesn't match with what our eyes expect:
An attempt at correcting the exposure in post-pro was some-what successful, but it would be even better if the external exposure were done in the scene setup, eliminating need for much post-pro.
So, to increase the exposure on the exterior image:
Adjust exposure in the "Post-Process: Tone Mapping" area of the Render Dialog while rendering.
Set the background image you have inserted onto a backplate plane inside your SU model and set it to be a Light Emitter material template set to type:"fake" with power starting at 200watts/m2 (may vary depending on the scene and camera/tone map settings)
Example of real photo demonstrating interior vs exterior lighting with photographic exposure.